Contact us
Global Headquarters,
645 Hulet Drive,
Bloomfield Hills,
Michigan 48302
Phone: (248) 869-0080
Global Headquarters, 645 Hulet Drive, Bloomfield Hills, Michigan 48302
Phone: (248) 869-0080
Send Bulk SMS Using MuleSoft and Twilio Function
Bulk SMS messages are a crucial part of modern communication, and by combining the power of Twilio Functions and MuleSoft, you can create a powerful and scalable solution.
This blog will guide you on how to utilize Twilio Functions and MuleSoft together to achieve efficient bulk SMS messaging.

1. Log In to Twilio: Go to the Twilio website (https://www.twilio.com). Click the “Sign Up” button to create a Twilio account. Verify your email address and mobile number. Log in to your Twilio account using the email address and password that you just created.
NOTE: In the trial account, SMS can only be sent to verified numbers. To send sms to an unverified number please upgrade your Twilio account.
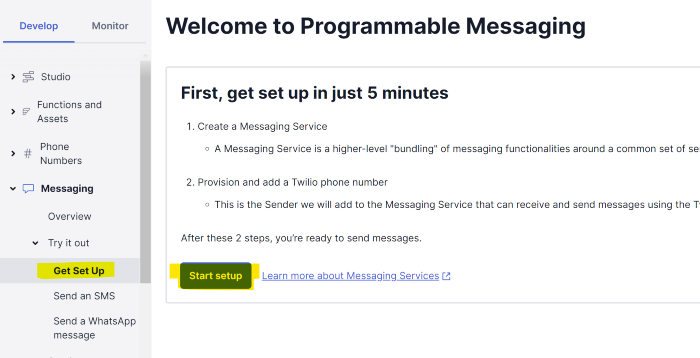
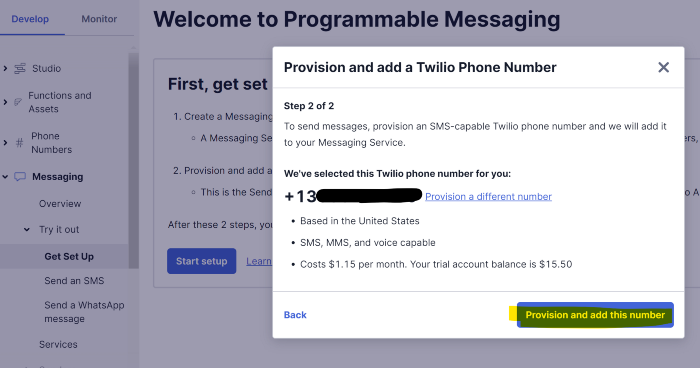
2. Set up a new Twilio number: Click the “Messaging” link in the navigation menu on the left side of the screen to set up your Twilio number, and follow the steps as highlighted in the images below.
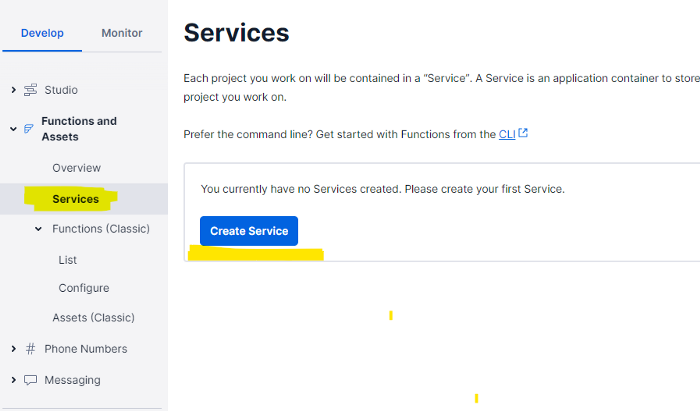
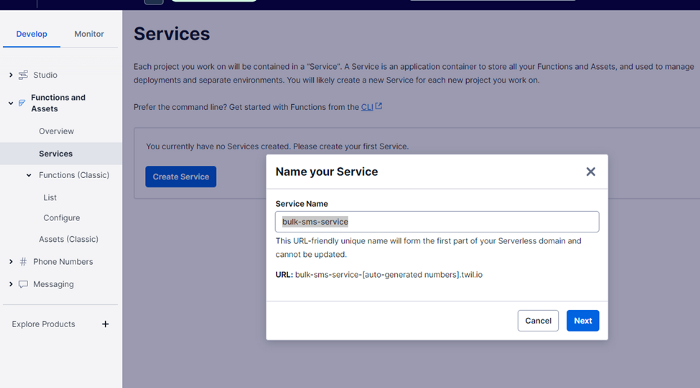
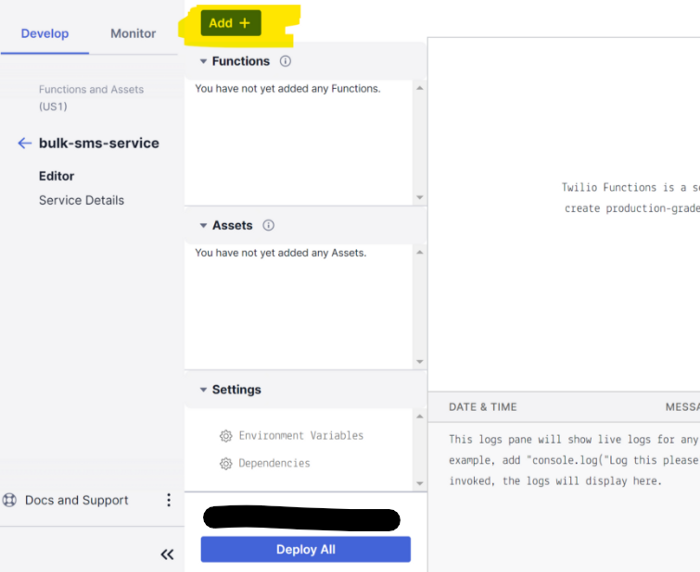
3. Create a new service: Go to the “Services” page and click the “Create a Service” button. Give your service a name, such as “bulk-sms-service”.
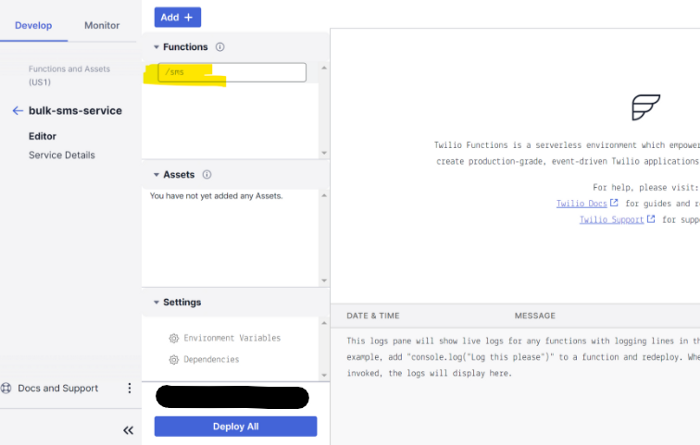
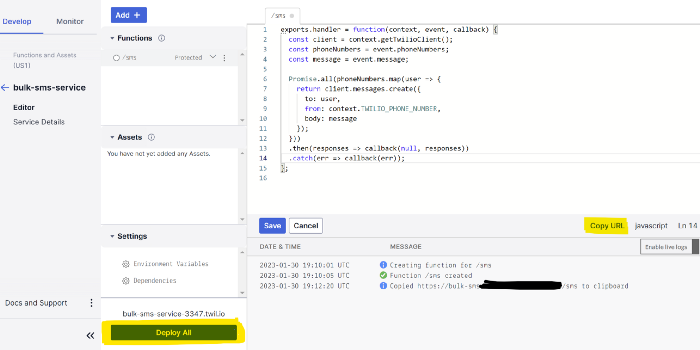
4. Create a function inside this service: Using the ‘Add’ button, create a new function and set a path such as ‘/sms’ as highlighted in the following images.
Note: Change the access privilege to ‘public’ after saving the path.
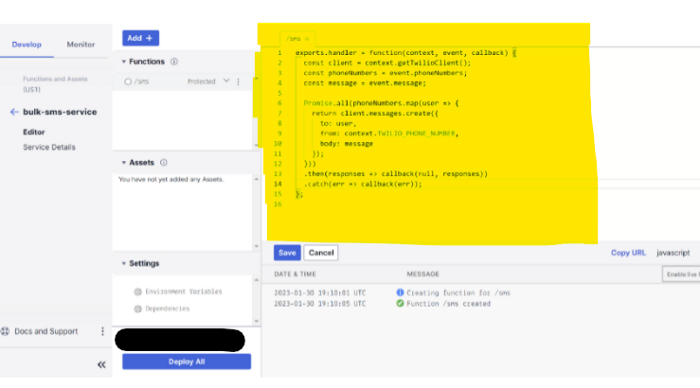
5. Add the code snippet: In the function code editor, paste the following code snippet as shown in the image and save the changes.
exports.handler = function(context, event, callback) {
// Import the Twilio client library
const client = context.getTwilioClient();
// Get the list of phone numbers from the event data
const phoneNumbers = event.phoneNumbers;
// Get the message to be sent from the event data
const message = event.message;
// Send the message to all the phone numbers in parallel
Promise.all(phoneNumbers.map(user => {
// Use the Twilio client to send a message to the current user
return client.messages.create({
to: user,
from: context.TWILIO_PHONE_NUMBER,
body: message
});
}))
// Callback with the responses from Twilio
.then(responses => callback(null, responses))
// Callback with the error if there is one
.catch(err => callback(err));
};
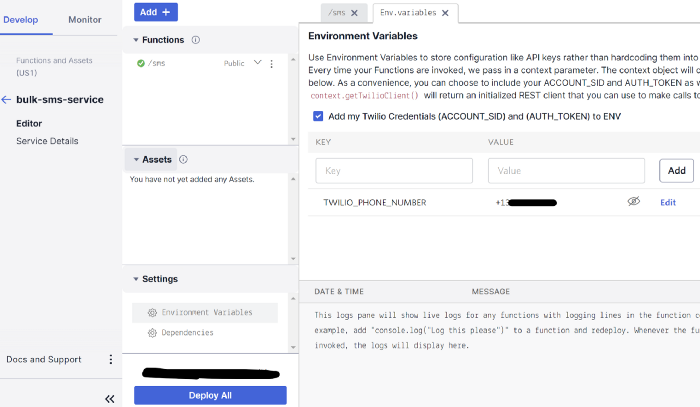
6. Environment Variables: Now go to the ‘Environment Variables’ section and add the variable ‘TWILIO_PHONE_NUMBER’ and enter your Twilio number as its value. Save and Deploy.
7. Function URL and CURL: You can now call your Twilio function from an external client app or Postman. Copy the URL from the lower right side of the console.
Here’s an example of a curl command that calls the Twilio Function:
curl -X POST https://YOUR_FUNCTION_URL.twil.io/sms \
-H ‘Content-Type: application/json’ \
-d ‘{
“phoneNumbers”: [ “+912222222222″ ,”+913333333333”],
“message”: “This is a test message”
}’
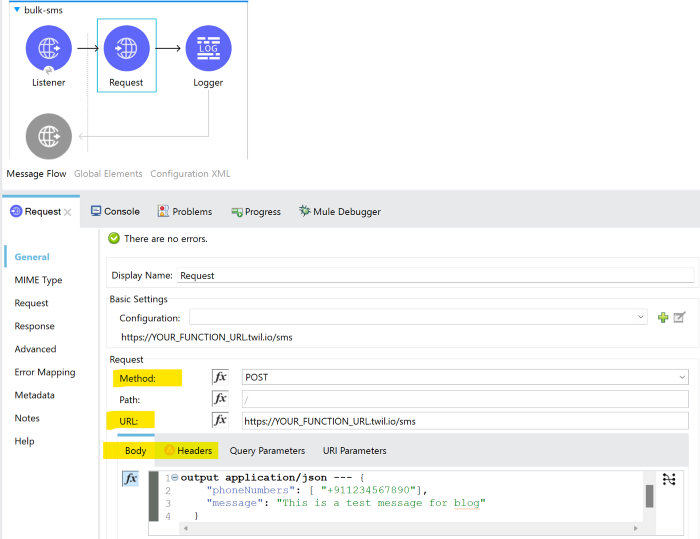
8. Integrate with MuleSoft: Configure the HTTP Request Connector in your MuleSoft application with the following details as shown in the image.
Method: POST
URL: https://YOUR_FUNCTION_URL.twil.io/sms
Headers: Content-Type: application/json
Payload:
{
“phoneNumbers”: [ “+912222222222″ ,”+913333333333”],
“message”: “This is a test message”
}
Conclusion: Sending SMS via Twilio & MuleSoft streamlines communication, saves time, and improves customer experience. Easy integration makes it accessible.
More Posts
Global Headquarters,
645 Hulet Drive,
Bloomfield Hills,
Michigan 48302
Phone: (248) 869-0080
Global Headquarters, 645 Hulet Drive, Bloomfield Hills, Michigan 48302
Phone: (248) 869-0080
Copyright © 2024 Openlogix Corp. | All rights reserved